If you have not yet read Less Stuff = More Freedom: Tips for Downsizing, go back and start reading there. Being mentally prepared is an important first step. And realize this project may (probably will) take more time than you think.
The following ten steps are what I (Nancy) use to declutter any messy space. I work on one space/area at a time. Small chunks—like a desk or closet—are less intimidating than a whole room or house. Perhaps you’ve heard it said, “How do you eat an elephant? … One bite at a time.”
A word of encouragement: ask a friend for help. If you don’t naturally enjoy sorting and organizing, look around at your friends and family; identify someone trustworthy, respectful and encouraging who has the gift of organization. See if that person will help you with your project!
Now, here we go:
Step 1: Obtain supplies. Gather trash bags, packing boxes, tape, markers and cleaning supplies – you’ll need more for larger projects, less for smaller ones. I get my supplies at Home Depot or Lowe’s (I like Home Depot’s boxes for the handles).
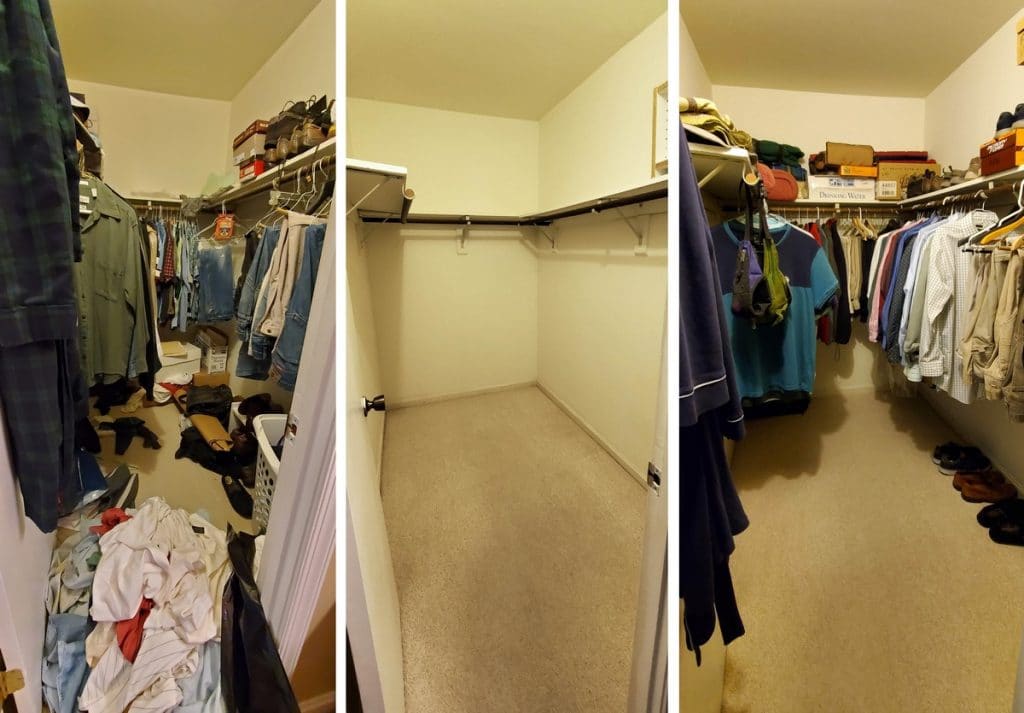
Step 2: Take a “before” picture. This picture will prove to you that you’re making progress as you work! (Although you may want to remember that sometimes things look worse before they get better.)
Step 3: Take out of the space anything you want to KEEP and put it in a holding area. You are taking out the important things that mean something to you or are useful. Use your spare bedroom, garage, set up a couple of card tables, or clear off the kitchen table – and sort your KEEP items there. Put them in piles, “like with like” (for example: books together, pens/pencils, pads of paper, trinkets, collectibles…).
Step 4: Next, take out the TRASH. Fill trash bags with everything that has no value, is broken (and will take more to fix than it’s worth), or no one wants. Here’s a helpful rule of thumb: if you can’t get more than a dollar for it, your family/friends don’t want it, and re-use-it shops won’t take it, throw it out.) See the note about being mentally prepared to downsize in Less Stuff = More Freedom: Tips to Downsizing.
Step 5: Fill GIVE boxes for family/friends. Anything you know family/friends might want, put into a box(es) marked “GIVE.” Suggestion: if your phone has a camera, take pictures of items you want to give away, and text/email them to loved ones to see if they are interested (if they say yes, make a time—soon—when they come to get the stuff).
Step 6: Fill DONATE boxes. Anything of worth that you and family/friends don’t want (and don’t want to try to sell) can be taken to a re-use-it shop. Check around to find the nearest drop-off site. And call ahead to verify that they will take everything. Put these boxes in your car right away and make a trip to the drop-off point; or ask a friend to take them away immediately.
Step 7: Give your empty space a thorough CLEANING. It can be difficult to clean around knickknacks and books on shelves and even worse to clean inside closets filled with clothes and accessories. Take advantage of the empty space and clean, clean, clean. Clean from top to bottom: ceiling, walls, shelves, under/around furniture, and finally floors.
Step 8: ORGANIZE the space effectively and put away your KEEP items. Only put back the things you REALLY want to keep. Find ways to organize your belongings. For example, use a box that fits inside a desk drawer to contain all your pens and pencils. Another idea: use a decorative crock to hold the large utensils you use often in the kitchen. Put things where it makes sense to you; then, you’ll remember where they belong and can put them away more easily after using.
Step 9: Take an “after” picture. It is fun to compare the before and after pictures. You will feel quite a sense of accomplishment, and you may enjoy showing them to others.
Step 10: Enjoy your tidy space. This is the best part of downsizing. Enjoy the fruit of your labors!
Closet Bonus Tip:
Rehang all the hangers in your closet backwards. When you wear something over the next month or two, hang it back in the closet with the hanger pointing inward as usual. In four-eight weeks, you’ll know what clothes you wear most often (except for seasonal items). Seriously consider getting rid of the clothes you don’t wear (unless they are favorites). Also give away or pitch clothes you don’t like, don’t look good on you, are overly worn, or cannot be repaired. Once you get those clothes out of your closet, you’ll have more room to enjoy the clothes you love.


